Patterns and tutorials

The Great Serpent of Ronka plush template

Great serpent of ronka plush toy

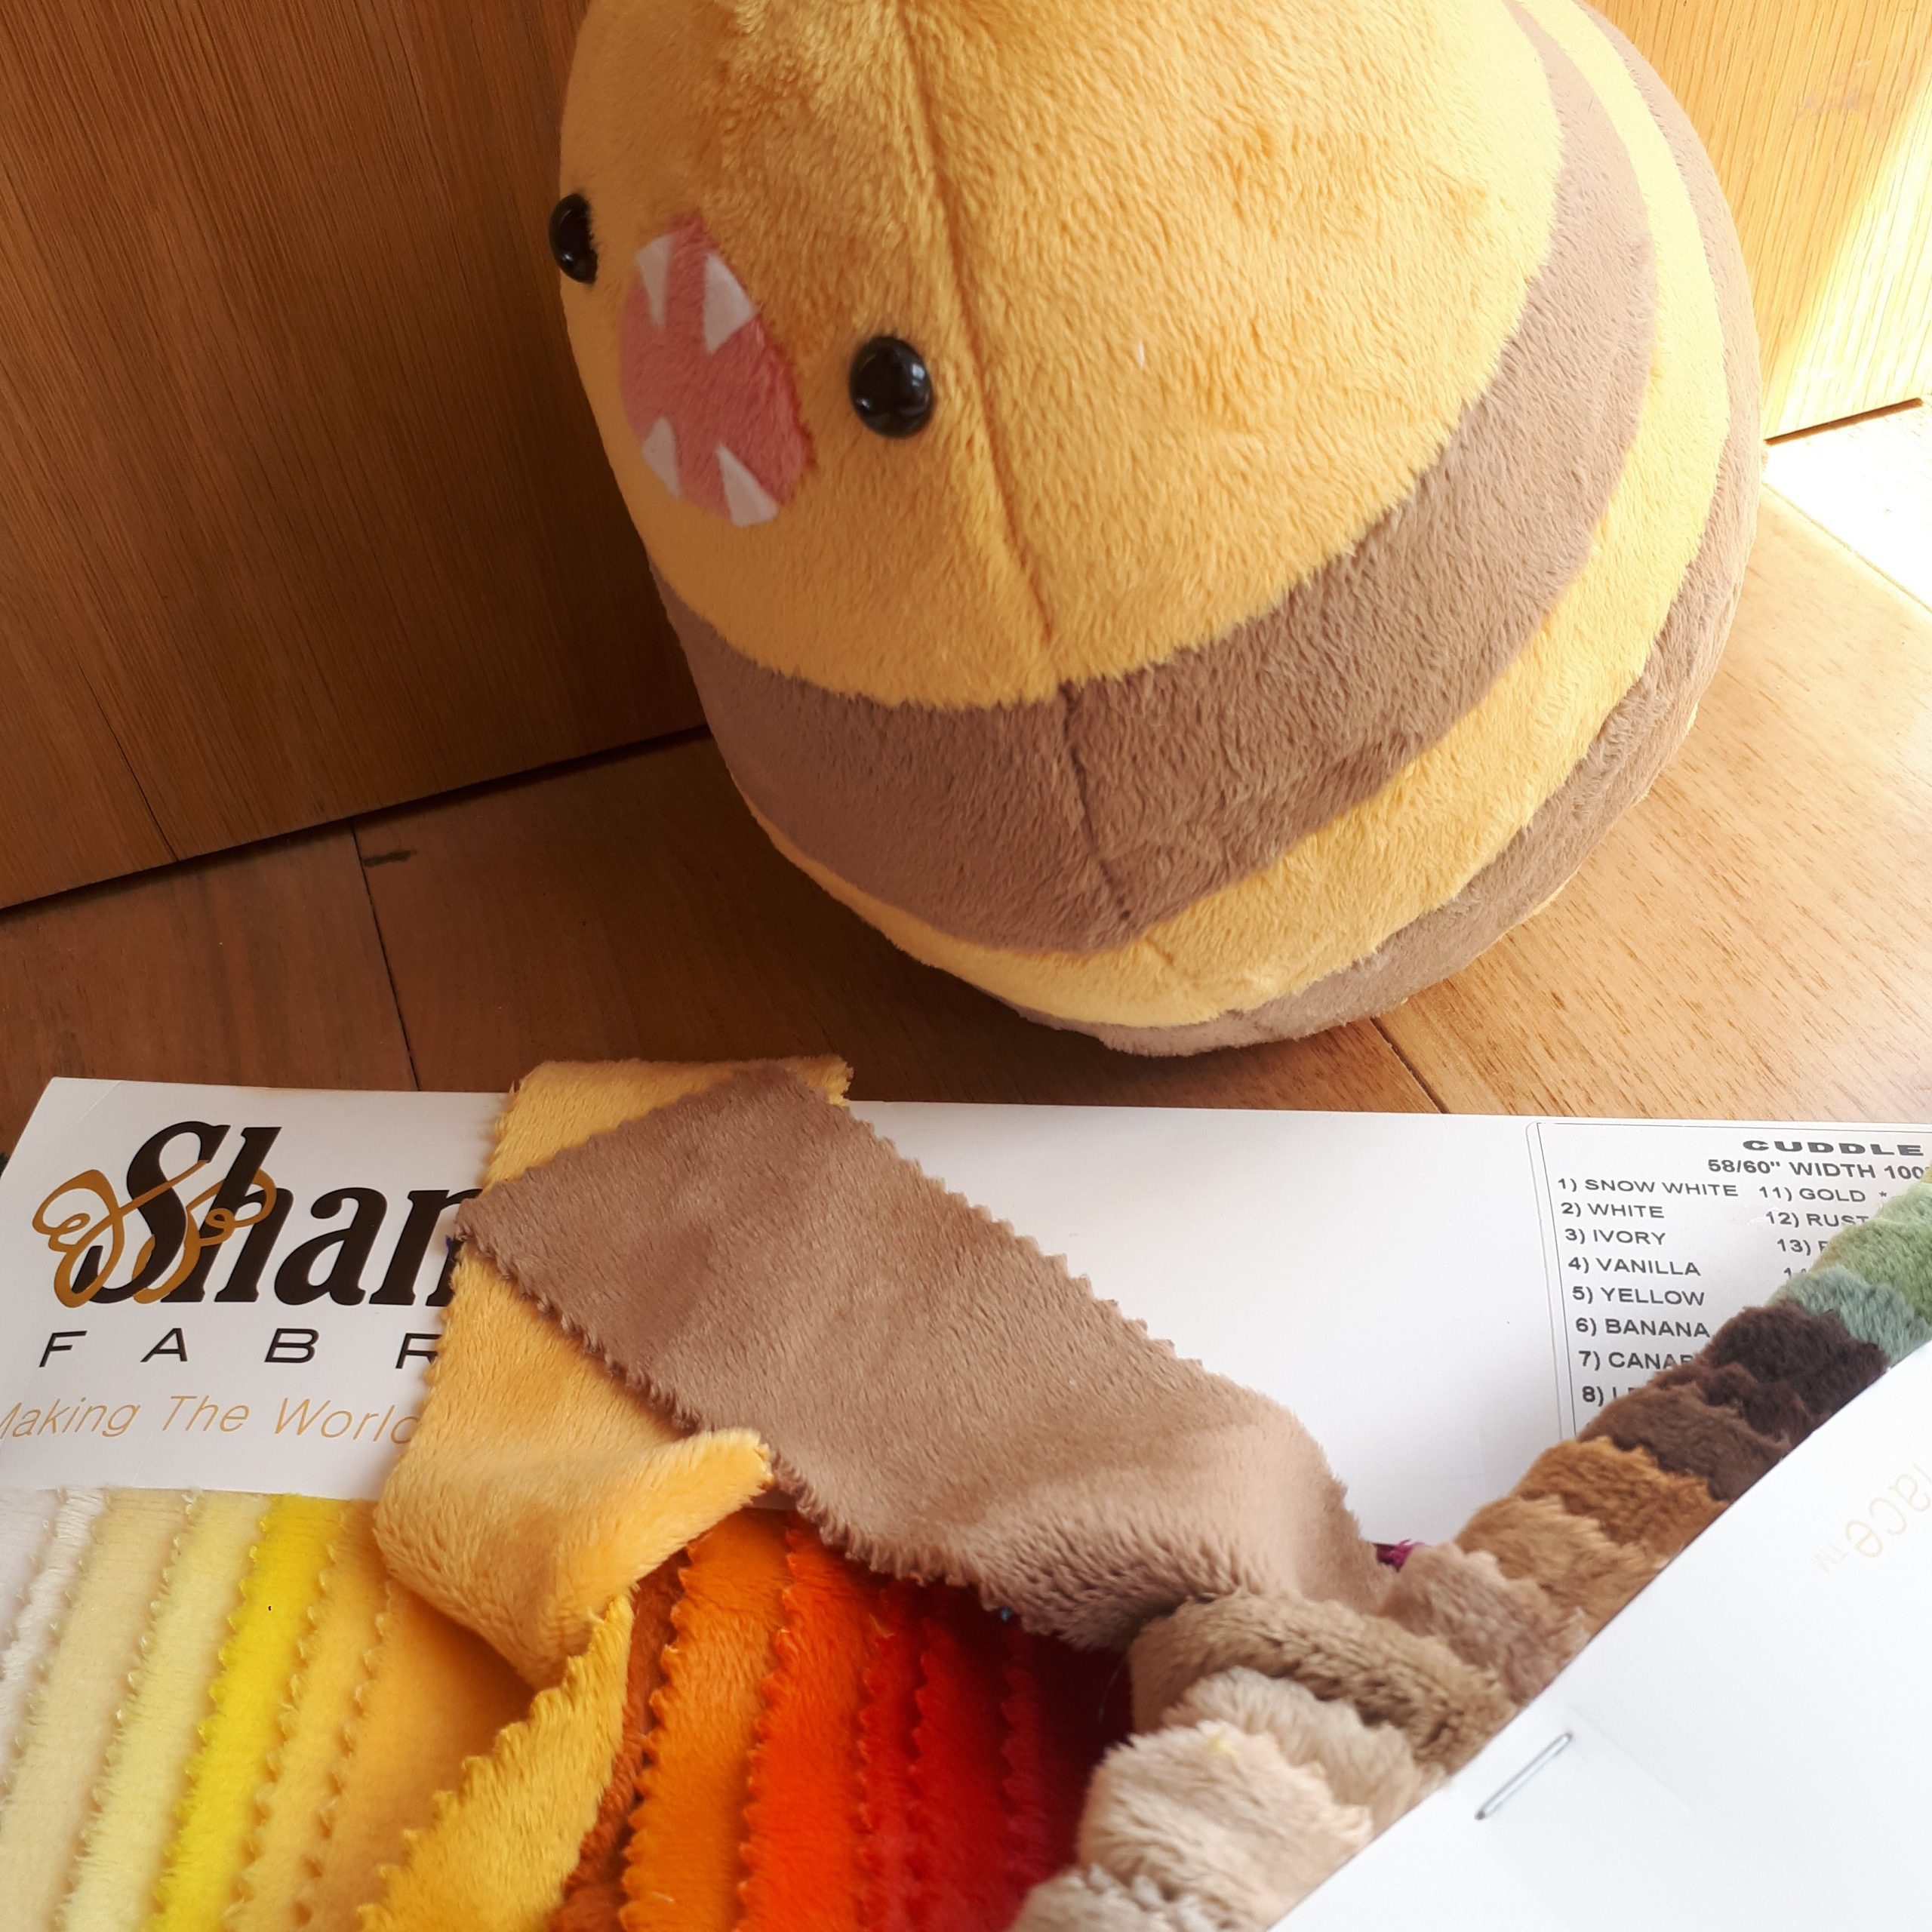
Want to make your own version of The Great Serpent of Ronka!? Download + print the template files and follow the instructions below. It’s a very simple plush to make but please comment if something in unclear and I’ll do my best to improve the instructions. I’ve aimed it towards super beginners so if you’ve made a soft toy before you can probably disregard most of it! Template Page 1 – Side Template Page 2 – Front + tail Materials Minky or fleece: Orange (I used Shannon Plush – Mango) Brown/Tan (I used Shannon Plush – Taupe. Cappuccino is very similar) A small amount of pink (I used Shannon Plush – Coral) Self adhesive white felt for teeth (or normal fleece/felt, fabric glue, and a steady hand) 1 pair of black plastic safety eyes – 10mm Polyfibre stuffing. Old pillowcase stuffing will do if you don’t have this already. Sewing needle, beige thread, ideally pins to keep everything in place while you sew (optional) Have an embroidery machine? DragonsGarden has kindly shared the embroidery files for their alteration of this pattern. Download the embroidery files and additional instructions here. Ignore the plastic eyes, pink minky and white felt if you The Great Serpent of Ronka plush template

Final Fantasy XV moogle plush template and tutorial

You will need: Minky/plush or fleece fabric in the following colours: White (lots) Pink Red Pale blue Purple Orange Thick black embroidery thread Polyester stuffing (optional) Plastic pellets/Poly pellets to add to stuffing Sewing template pieces: Download the sewing template/pattern Plushie tutorial: Body: Attach the blue circle to the front of the body Use the thick embroidery thread to add the “stitching” details. These aren’t actually holding anything together, they’re for aesthetics only. Sew the body together and leave the neck open. If using poly pellets, start with a few handfuls of the pellets. This makes the plush bottom-heavy which helps it sit up and gives it a pleasant weight. Then fill the rest with polyester stuffing. Head: Assemble the four head pieces together, leaving the opening at the base of the head as this will be hidden by the body. Use the embroidery thread to add two eyes (I’ve marked the location of the eyes on the template). If you’ve embroidered before, use your favourite stitch for the scale of the plush. If you haven’t embroidered before, try a split stitch. It’s the only one I can do! Stuff the head with polyester stuffing only Nose: Sew the nose pieces together Final Fantasy XV moogle plush template and tutorial

Using felt tip/marker pens on teddy bears and plushes

Marker pens can be used to add detail, highlight features or add intricate detail that can’t be achieved via embroidery (eg on a thick pile fabric) to your creations. Even if you don’t have a obvious design that needs to be drawn, markers can be used behind eyes to make them stand out or for other body details. However, not all pens are created equal – some are more suitable to certain applications than others, and some are just a no-go area all together. Here I’ll take you though the various types of pen I’ve used and my results of each. Dark colours on light fabric Sharpie markers While there’s a good chance you have a sharpie or similar laying around at home, they’re not a good choice for application to fabric. These pens are oil based and long after the ink has dried you’ll find that the colour continues to smudge across the fabric. I’ve nearly ruined a few pieces this way before I realised what the problem is. The blue is the worst for it but the rest of the colours including black will continue to smudge. I’ve also tried supermarket own brand permanent markers that are a little less smudgy Using felt tip/marker pens on teddy bears and plushes

Litten plushie sewing template

I’ve already shared my Rowlet plushie sewing template, and today I’ve finally got around to digitising the sewing template for my Litten plush too. I love the Pokemon Sun and Moon starters and I can’t wait until the game is released. While I wait for Pokemon Sun and Moon to become available, I guess I’ll be making any Gen 7 Pokemon plushes that I can (keep an eye out for a Lunaala plush soon). So, here is my Litten plush template. It’s much more fiddly and time consuming than Rowlet but produces a nice looking beanie-style Litten. I wouldn’t recommend it for beginners. This template has very little embroidery – only a small amount for the nose and mouth that could easily be completed with a permanent marker if you’re not comfortable with embroidery at all. If instead you’d rather embroider the eyes and other face detail then I’ll leave it to you to simplify the sewing template and omit the detail you’ll be embroidering instead. Please share any of your creations from either the Rowlet or Litten plush templates in the comments! I’d love to see them!

Rowlet plush sewing template (+shiny rowlet colour guide)

Welcome to my Rowlet / Shiny Rowlet plush tutorial! This plush doesn’t need an embroidery machine and eye detail can either be made with sticky back felt or there’s some very basic hand embroidery. The sewing template is designed to be printed at A4 sized and marks the sewing line. You will need to cut around 5mm around the edge of all pieces of the template as a seam. Template Page 1 Template Page 2 You will need: Minky or fleece: Brown/Tan [Light blue if shiny] White Green [Teal if shiny] Orange [Red if shiny] For the eyes – either sticky back felt (black & white) or black embroidery thread Polyfibre stuffing. Old pillowcase stuffing will do if you don’t have this already. I made this plush a long time ago so I’m afraid there’s no helpful photos to guide you, but hopefully it’s simple enough to follow if you’ve made a plush toy before. (optional – if you’re going for embroidered ^_^ eyes, sew them on to the eye piece of the body now) Sew the inset white eye area to the brown front of the body. Pin it in place otherwise you’ll end up with it all off Rowlet plush sewing template (+shiny rowlet colour guide)

How To: Make perfect plushie feet

Want to know how to make cute plushie feet with footpads and claws? I went though several iterations of plushie feet before I came to a fool-proof template that’s simple but get’s great results. These feet are big and chunky and best suit a chibi or chunky-style plush – but it’s up to you to decide if these will suit your creation. Legs and feet can be hard – when I was making my first dragon plush I went though several styles of legs and different ways of making claws – none of which looked quite right on my roly-poly dragon. I soon realised that simpler is better and I came up with the following template for a shunky plushie foot with a different coloured footpad and big claws. All of it should be completed in a soft fabric like minky/cuddle-soft or fleece. This includes the toes/claws. I tried some large 3D claws in felt and they just looked terrible. I’ve seen a couple of plushies with flat felt claws made from a single layer of felt that are sewn in on the seem – they do the job but I really don’t like the affect either (sorry). The method below is definately How To: Make perfect plushie feet

How To: Get started at plushie making

Interested in making plushies or fabric toys? Here are some really useful pointers on what you’ll need to get started (on a budget) and some tips on what to watch out for. Everyone has to start somewhere. Your first plushies wont be perfect, some skills take some trial and error to get right, but with this guide you’ll be able to skip some of the mess, save yourself some time and have your first creations looking that little bit more polished and presentable. FYI, my first plushies were a Paopu fruit (just like hundreds of teenage girls) and Chiyo-chichi – the father-cat-orange thing from bizarre anime Azumanga Daioh. They were flat and they were a bit crap, but they were something. First, I’ll start with some really important tips. Then, I’ll get to a list of items you’ll want to start with the minimal amount of spend. Top tips Start small, but not too small – Keeping your creation small will help with fabric costs and time spent – but if you go too small then it’s impossible to get a good level of detail on your plush. Also, there is a minimum tolerance in fabric to bend to shape. This depends on the fabric, How To: Get started at plushie making

Oka plushie sewing template (Xenoblade Chronicles)

I couldn’t leave dear Riki without his wifeypon, Oka. The following template is based on the official Xenoblade Chronicles Riki plush template with a different outfit. Number of copies of each component is included on the template. Use the concept image on the template or any of my Oka plush images for reference. Suggested fabrics are fleece/minky for the body and felt for the costume. I also used a darker pink minky for the bow but you could use any fabric you want. You’ll also need a face/cheeks (which I’ve again done in felt but would be lovely if embroidered) and feathers for the hair. Download high-res template (160 kB)